Saturday, January 12, 2013

So, what does 2 quarts of Resin get you?

Well, I finished the molds for various parts. Some of them worked out alright. None of them were a complete success. As you can probably guess, I've been casting up copies of the master parts I've been building the last few weeks. Some of the molds turned out pretty good, some of them not so great. In either case it's been a learning experience and now I'd like to share some of that experience with all of you. What I am saying? Learn from my mistakes. Heed my advice. See where I messed up so you don't make the same mistake if you try this sort of work.

So, first up are the molds I've made.
the various molds I've made in the last couple months.
That is a series of 6 molds I've created over the last few months, using various approaches, materials and ideas. Here's the differences between each:

the first 2 part mold I made for quick casting Hellfire missiles.
 This is actually the first 2 part mold I made. As you can see I made it so I could cast up 4 hellfire missiles at a time and one Ork twin linked big shoota. I was intending to use the shoota as the basis for my Chaos Thunderhawk Hunter guns, but alas my first attempt at a two part mold was somewhat flawed and the clay I used in the process turned into a sticky gum when I used the mold release agent on it. This mold was made using Smooth-On's Oomoo-30 Silicone Rubber kit.

the second 2 part mold I made using Smooth-On's PMC-121 urethane rubber
This is the second attempt I made for a hell fire cast. This rubber is Smooth On's PMC-121. This rubber has the advantage of being much denser and thus stronger and more rigid and thus better at grabbing details. The down side? 16-20 hour demold time. That means once you pour the rubber, it's a day until you can pull the mold up. Making a 2 part mold? Don't expect to be able to use it with 48 hours of starting to make the mold.

these molds are for various pieces for the Thunderbolt and are made using Smooth On's Oomoo 25 and 30 silicone rubbers.

These molds are of the various parts for the thunderbolt. The molds at the top are the engine mounts and the intakes for the engine. To save time I made 2 molds of each so I could cast up the pair of each part I needed in one go. 
The right wing mold
The wing mold... oi vey as this thing ever been a pain in the butt. See here's the thing. In the final wing I want to have magnets in the bottom of the wing Pylon so I can attach hell fire missiles or fuel pods to the model. So I want to be able to put the magnets IN the wing pylons when I cast the wing. Well there's no way I can cast the pylons, and the wing at the same time. So I have to spray down the mold with release agent first, then cast the pylons and let those set till at least stiff and not runny. Then I have to close us the mold, and cast the rest of the wing. And what happens if any part of the process has a problem or isn't done correctly?

This!
a bad cast of the wing

So what do I do? I have to be VERY patient and do each step correctly each time. Roughly it will take me about an hour and half to cast the wing properly.
Like this one:
a good cast of the right wing

The rest of the casting results depend largely on my patience when I cast the part in the question. The exception to this are the engine intakes and the engine mounts.
the intakes came out well enough.

 The intakes turn out fairly well with little effort. Just a little clean up to even out the backs and they'll be good to use.
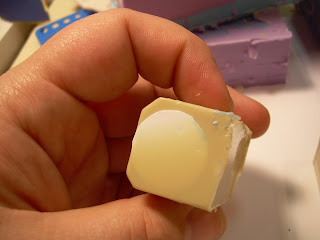
the engine mounting blocks

The engine mounts likewise turn out well easily enough. To reduce the weight, and the amount of resin I need for each I submerged sealed styrene tubes in to the resin as it's setting. You can see one of the tubes in the above picture. This effectively makes the part hollow with needing to make it a multi-part construct. Again, just need a little clean up to make the piece workable.

The Engine itself as been a trying expirament:
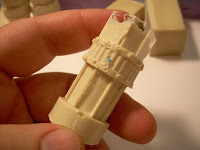


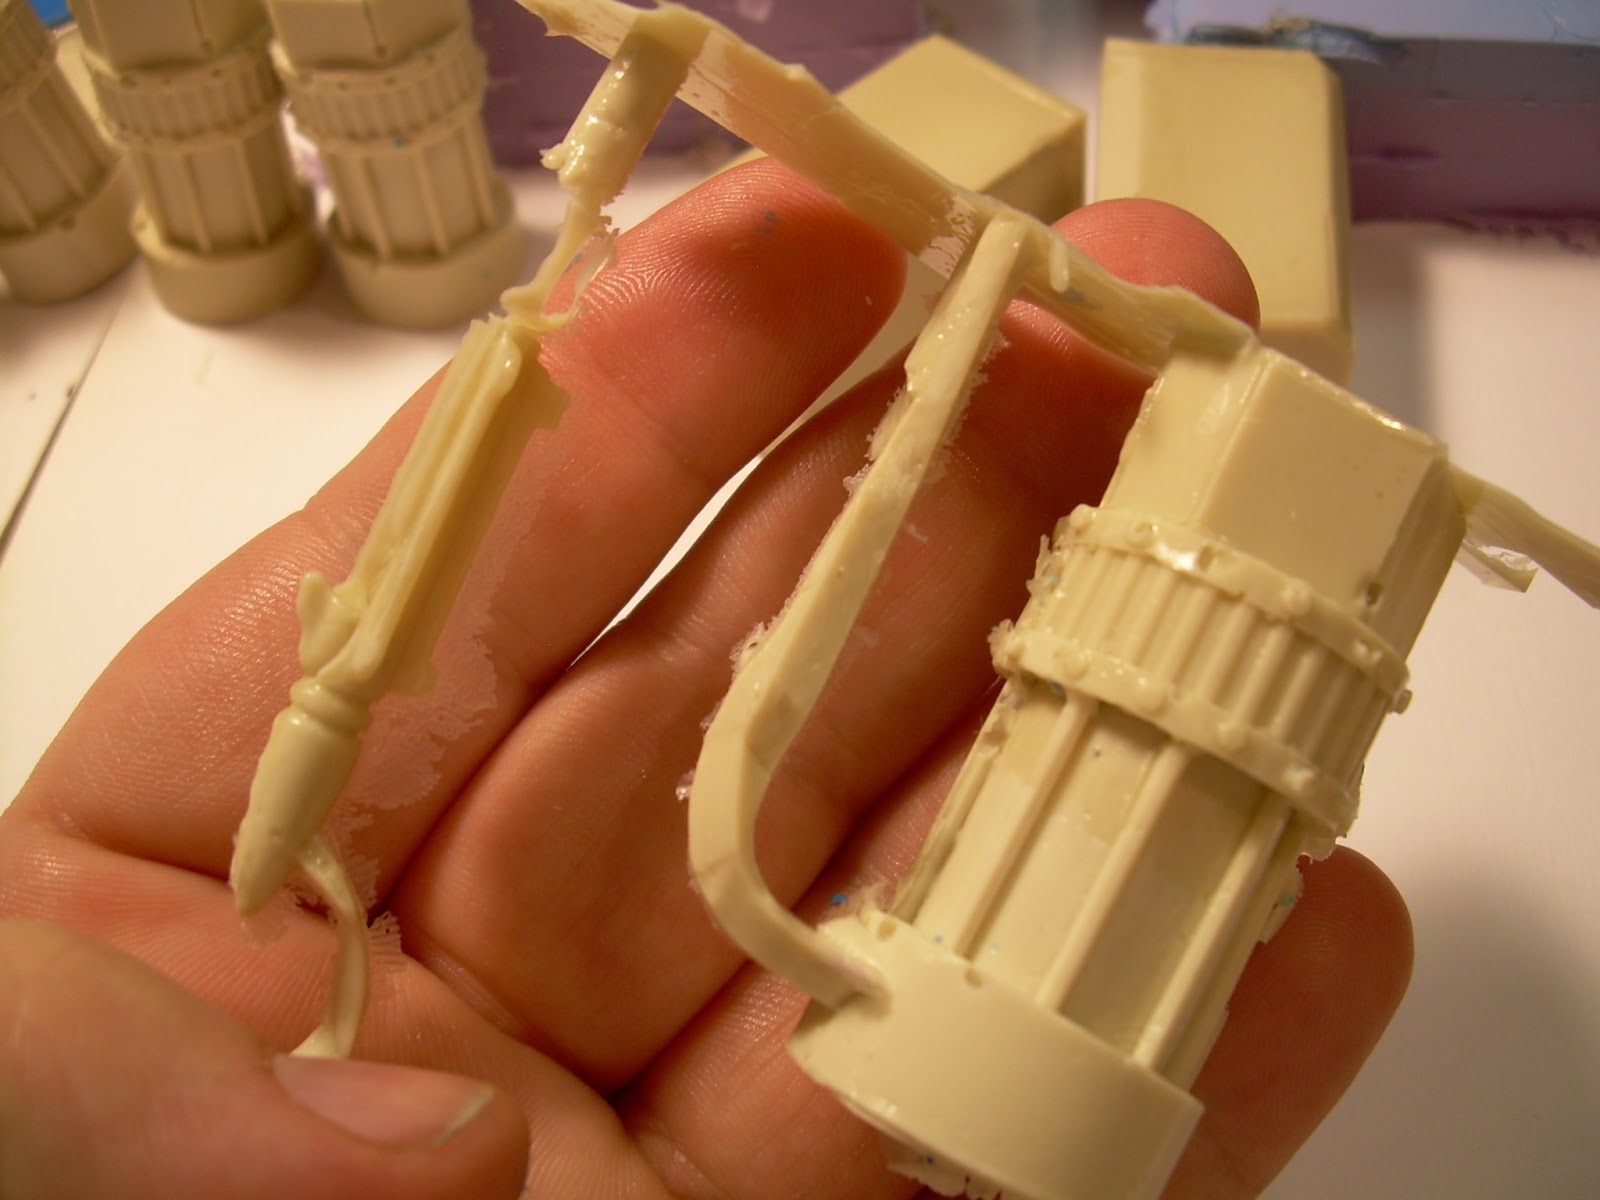
Oh yeah, the engine has proven to be the most difficult large piece to cast. Because of the small details on it, the resin tends to "bubble" over the details and then dry, leaving a void in the finished piece. You can this in the first couple attempts. So how have I solved this? Simple. Patiance. Namely instead of trying to cast the entire engine in one single go I try to cast in three steps using less resin and poring the resin very slowly at each step.


In this lastest effort I did it in three passes, pouring about 1/2 ounce of resin each time, pouring it along the shaft of a stir stick and trying to keep it the pour rate to a very shallow thin stream in order to give the resin time to spread out and fill in the details on the inside of the mold. Still need some clean up on the finished piece but a substantial improvement over the earlier attempts.

The small tiny details on the weapons have been an absolute nightmare to overcome and honestly I haven't quit gotten them beat yet. Much like the small detail on the engine, the resin as a tendency to bubble up and fill the mold of the smaller pieces creating these large gaping voids ruining the part.
the bubbling problem ruined this attempted casting of a lascannon barrel.
This is the most notable example of this particular problem. Where is the rest of the Lascannon? And why is the body of the hellstrike Missile hollow? Yep, that bubbling problem at work again.


This casting was notably better but still has a hallow body to the lascannon. I MIGHT be able to use this one. Have to look into it more closely.

the best casting yet
This is actually the best casting of those parts yet. YES it has a metric crap ton of clean up on it but guess what? All the of parts and pieces are there! So that's a win.

Now, here's a piece of advice for you if you get into casting: Spend the $10 bucks and get one of these:
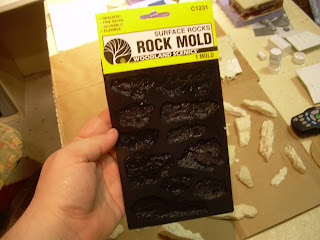
a scenic woodlands rock mold
Why? So that if you have an extra 1/2 ounce of resin you don't waste it. Spray this rock mold with some mold release and pour the extra resin into the mold. Just save the extra rocks in a box. You can use the rocks for basing or other terrain projects. You'll look into the box at some point and go "Holy crap! That would look great for my [insert model name here] as a base!" or something of that nature. And you'll wind up with plenty of them in a hurry too.
don't waste extra resin. Put it to use. Cast some rocks.
Same thing works if you're using green stuff and have some extra. Press the extra into the rock mold. Viola! You've got a rock you can use for basing or detailing.

Thursday, January 10, 2013

288 lego bricks.... 3 quarts of silocone rubber... 2 pounds of synthetic silicone clay... a couple ounces of silicone ethal spray... 3 ceramic tiles...

 288 lego bricks....  3 quarts of silocone rubber... 2 pounds of synthetic silicone clay...  a couple ounces of silicone ethal spray (mold release)... 3 ceramic tiles...
So, what does all of that add up? Well right now it adds up to 3 Lego boxes filled with silicone on top of the dryer. My orders came in and now i can continue work on the Thunderbolt, the body of which you can see on the flight stand on the left side of the image.

The first box (on the left) is the first half of a 2 part mold which will have the back section of the engine, the Ammo Hopper I built a while back, a lascannon, and the Autocannon with the angled mount for the thunderbolt. The second box is a single piece mold and contains the intake for the engine and the engine mount itself. The third box in the first half of the mold for the right wing.

Something I'm going to try to do is adding magnets to the design of this model. Particularly for the missiles. So what I'm going to do is cast the wings up with magnets at the base of the weapon pylons, and then cast up the hellstrike missiles with magnets in the bodies of those. So that way the missiles can be attached to the pylons, and removed once they are fired in a game.

Sunday, January 06, 2013

thought I'd provide some information

As I've previously stated my work on the thunderbolt is more or less on hold until I get more materials. I can still work on small details and I am, but I can't make any major head way on the body until I get the materials to cast the molds of the engine mounts. So I've already ordered them so now it's just a waiting game. In the mean time I thought I'd post some information about the materials I'm using for this project.

The first thing is obviously the Styrene, or plastic, materials I'm using. For the large part, the majority of my styrene is coming from Plastruct. They've been around for a while and offer a truely staggering array of extruded styrene shapes and forms. I've also purchased Styrene from another company called EveryGreen Scale models. Their selection isn't as huge as Plastructs', but they have some stuff that Plastruct doesn't.

Take a look at the engine master I built. As I previously mentioned, it's a series of tubes set into one another with other detail added to that.
the scratch built master of the back section of the engine

Here is a structural break down of what I used to build the engine master:
the exploded view diagrame of the back section of the engine
Because I will be referring to different sizes, I have color coded this passage to match with the diagram. The green tube is a length of Plastruct's TB-24 piping, which is measured at 19mm outside diameter. The pink is TB-28 tubing and measures at 22mm. The blue, which slips around the forward most length of TB-28, is a segment of TB-32 and is the largest piece of Plastructs inventory of piping I've needed to order yet. It measures in at 25mm outer diameter. The sea foam green 'C' is a wrap of textured plastic from EverGreen's assortment. The precise one I used in this case is listed as E-5 '4529' "Metal Siding" and is sold in sheets of 100 square inches. Apply a little bit of heat and it becomes pliable and can simply be glued into the length of TB-28.

The floating yellow squares are just panels of .5mm thick styrene I cut and glued to the last section of exposed TB-24. The teal length between the segments of TB-28 are simply lengths of 1mm thick Hex-rod. Plastruct's got these listed as MRX-60. I also got .1mm lengths of these hex rods to become the bolts on the sides of the engine you see in the finished product.

And that's the breakdown of how I built the master for the back half of the engine.

The forward intake was a similar process but needed some innovation to accomplish.
exploded view of the intake section of the enginethe scratch built intake for the engine

Like with the back section of the engine the intake housing is built out of 2 lengths of pipe set into one another. The inner section, shown in pink is a length of TB-28 while the blue is a length of TB-32. The red is a disc of 1mm thick sheet styrene. For the intake blades I had to get creative. I make 4 discs of .1mm thick styrene, the same diameter as the inside of the TB-28. I then cut those dics into 8 segments, like a pizza. Then I glued down each blade seperatly so that each successive blade was over half of the previous one. I had to get a little fiddly with the last two or three in order to get them to line up properly but it worked out. Then I took a hold punch that measured just under 5mm in diameter and punched out the center of the assembled fan blades.
I then took a length of Plastruct's MR-190 5mm rod and sanded one end down to a rounded nub and then put that through the hole I made in the fan blades. To help simplify it all out I attached a scrap piece of styrene to back of the .1mm disc.

And there you have how I build the engine masters for the thunderbolt fighter.


Friday, January 04, 2013

Delays....

Well I've hit a little bit of a delay in work on the thunderbolt. Namely I need to wait for materials to come in. Yes, I am out of molding compound and had to order more. Hopefully the order will be in sometime early next week. For whatever reason I can not fathom, I am able to get reactive compounds, that have been used in the production of IEDs from over seas faster then I can order plane old sheet of sheet styrene from with in the continental US. Anyone else have that sort of... oddity in their country?

Anyway, I had actually managed to get a fair amount of work done before I realised I was out of molding compound.

The engine master, the main engine piece, the engine mounting block, engine detailing for smash casting, and the air intake for the engine.

As you can see there are 5 components there, well okay maybe you can't see all 5. There's the engine master on the left, behind that is the central engine that will go into the main body of the Thunderbolt. On the ceramic tile is the engine mount on the back, that big block looking thing. The intake for the engine closer to the camera and then to the left of the intake is another piece. it's really hard to see but it's the master for a detail piece I'm going to smash cast to apply to the engine master before i cast the copies of the engine.

I test fit the central engine earlier:
test fitting of the main engine in the body
It does fit but I'll need to put material in the body to secure it. As it stand now it's just too damned heavy for a couple dabs of plastic glue to secure it. I'm considering filling the body with resin and using that to secure the engine housing. Not only will that secure it, but it will also make the body very strong and resilient to being handled.

Wednesday, January 02, 2013

New update on Project Thunderhawk... er bolt... thunderhawk bolt

Okay so I'm not sure what I'm calling this project anymore. I'm still intending to build a Thunderhawk, but the case-study of building a Thunderbolt has really taken on it's own life and become a project onto itself. Regardless I am making progress. One of the key points I was planning on under taking in building the Thunderbolt was scratching one engine and then casting two copies of it for the finished model. Well, I've finished building the original master:

the scratch built master of the engine
The engine itself is build with a long central tube, and several larger segments of tubing glued to the body. I'll explain in more detail below.


color coded break down of the engine

The red is a single long tube measuring 5 centimeters. if you look at the front you'll see 2 colored rings, one purple and one blue. Those are each another ring of piping affixed to the tube. The green ring further back is another segment of tube the same thickness as the purple tube at the front, but this one has a layer of roof textured glued to it. Then the green and black segments in the front are lengths of hex rod glued in place.

The way the template has the engines, they are built in 2 parts and then each affixed to a box on the side of the main body. Here you see the scratch built air-intake and the main engine housing.
I have some details to add to the master before it's ready to cast but it's all repetitive details, items that appear in multiple places on the finished model. So what I'm going to do is quick-cast a mold of the master of the detail part, then with the finished mold use green stuff to cast copies of it that can then be affixed to the engine master. With a little luck, I'll be posting on that in the next few days.

Wednesday, December 26, 2012

Post-Christmas Update

Hey everyone. I know I know, I haven't posted in almost a... *looks at last post*... in quit a while. It's that time of the year. You know the one, where your basic work load doubles, customers tempers fray needlessly, everyone is in a rush and everyone must get the answer/item they want no matter what anyone else thinks, says, or does. Or what the reality of the situation is. Oh wait, that's only if you work in retail. Yeah, for all of you who work in retail you know what I'm talking about. This time of year is harder then any other segment of the year with out question. And I have to deal with it. So that's why I haven't posted in several weeks. On a brighter note, all that work is paying off.

When I took my current position my department was ranked as 1106 out of the company with a total of 1116 spots. At that level there really isn't anyway to slip further down the scale unless you are honestly and sincerely trying to fail. That was 3 months ago. As of the beginning of December we were 221, and has of this past Monday, we were 302. Now that sounds like we're sliding back down, a fluctuation of 79 spots is very common with the department rankings. Our rankings are based on client and customer reviews that are submitted through an online survey. The client is presented with a series of 20 questions and a scale of 1 to 10. And then asked to rank how they feel we performed based on each question.

Of the 150-200 customers we deal with in a given week, perhaps 3 or 4 will actually take the survey. And of those 4, maybe 1 will actually think about their answer. More often the rankings are totally arbitrary and are all 10s or all 1s. So with 8 reviews with all 100's on the record, if we get a review that is all 1s, we just dropped from a 100% ranking to a 87% which can easily translate to a drop of 40 spots in the ranking. Imagine how much we drop if we only have 5 reviews and one of them is all 1s?

That being said, the new year is right around the corner. And with the new year comes new opportunities. I'm sure many of you have seen the leaked images of the new Dark Angle models. I'll withhold judgement until I can get my hands on the models and do a proper review of the kits.

As an aside, the digital camera I had been using for my posts is no longer mine to use. So for the immediate time I will be limited to taking pictures with my phone.

Though one brighter note. I got the audio drama "Horus Heresy: The Dark King/The Lightning Tower" for Christmas. I haven't had the chance to really sit down and listen to it just yet, but it did lead me to organizing my media library a little bit. Getting a rather nice collection aren't I?

Friday, November 16, 2012

Project Thunderhawk... in thunderbolt form


So I'm still working on the thunderbolt model. Updates are going to be rather infrequent for the next couple of weeks due to family, holidays and work. I still work retail after all and it's still the Christmas season. Thankfully, my company is not one of the ones who are opening Thanksgiving Day so at least I'll have some time to gorge myself on turkey and stuffing.


thunderbolt body


The body is largely complete. Between the 2mm thick sides and the resin filled belly this thing is shaping up to be very sturdy. Now I get into the really interesting stuff: Everything else. I've already made an ammo hopper:

ammo hopper for the Thunderbolt


I think I've got a solid start to it. As a means of expanding my skills rather than just build a second ammo hopper from scratch I'm going to try casting up 2 of these to use on the model. I'm also going to try the same thing for the engines but first I need to build those and in order to build them I need to wait for my order of supplies to come in. Well waiting... what a drag.

Monday, November 12, 2012

Project Thunderhawk continues... kind of

Okay so I'm continuing work on my Project Thunderhawk. And now I'm actually working with a Plasticard!

But I'm not building a Thunderhawk. Not yet anyway. Just as I did with the Shadowsword, I am making a divergent case study project for this next step of the project. This time I'm building a Thunderbolt Imperial Heavy Fighter!
Thunderbolt model from Forge World
Thunderbolt Heavy Fighter


About a year ago I found Eli Patoroch's library of Paper hammer templates and I was taken by the template for the Thunderbolt. Just looking at the template it's clear that the thunderbolt is a revertible Pit Bull of an aircraft. Stocky and solid, armed to the teeth. It's the Imperial Navy's answer to anything they want to kill. So I built that thunderbolt based on the template, with a couple modifications:
My paperhammer built thunderbolt colored in the crimson colors of the Red Dragon
The Rad Dragon Thunderbolt
 Obviously the biggest modification I made is the position of the wings. This particular model is the fourth paper hammer Thunderbolt I've built. When I built the original one I put the wings on wrong and didn't realise it right away. Later on I looked at the model picture on Forge world and noticed the fubar. But I like the higher mounted wings with the downward angeling to them.

I also added the pylons for 2 missiles, donated from a Valkryie kit. If you read the Datasheet for the Thunderbolt in the Appoc book, there's a mention of a Red Thunderbolt. That is where this paint scheme came from.

So now I'm embarking on a project to build one of these in plasticard. And I had to restart it cause the first model fell apart. And again because the second model wasn't strong enough to stand up to being handled. And for a third time because plasticard doesn't bend and flex the way paper and cardboard do.

So finally I'm on the fourth version of the Plasticard Thunderbolt!
The body of the thundebolt!


In this version I used 2mm thick sheet plasticard for the two large sections of the sides, and I built an internal frame out of the same 2mm thick plasticard. Then to enforce the structural integrity of it I fill the lower section with resin after setting in a piece of 1/2" pvc piping to act as a mounting point for one of Dragon Forge's Flight Stands.


Saturday, November 10, 2012

Cultist conversions

So I've been more then a little busy and haven't had the time to commit to some of my hobby projects that I would have liked to. For the most part I've been able to squeeze out a few hours a week recently. This has lead to slow progress on most of my projects and short and simple other projects. This is an example of the later.

I've gotten my hands on nearly 100 cultist models from the Dark Vengeance starter set. So now I've got 400 points worth of cannon fodder/tar pitting/pain in the butt units to throw at my enemies. Yaah for me. I have 400 points where every 5th guy is identical... boo. So I've been working on converting the models. Not extensively, but enough to break up the uniformity of the models. These conversions consist largely of minor head and hand swaps but I think they meet the bill. Some point in the not-too distant future I hope to go back and fill in some gaps with green stuff.
Converted Chaos Cultist with a spiked mace and autopistol

Chaos Cultist, converted with a simple head swap

converted Chaos Cultist

converted Chaos Cultist

converted Chaos Cultist

converted Chaos Cultist

converted Chaos Cultist

converted Chaos Cultist

converted Chaos Cultist

converted Chaos Cultist

Thursday, November 01, 2012

still alive

Okay, it's been a helluva couple weeks but I haven't been totally inactive.

First and foremost, my father built a case for some of my tools. This case had originally been intended for my computer tools for work. However, it turns out that I'm prohibited from bringing my own tools to work. So I had this great case, and no immediate use for it. What do I do? Convert it for use with my hobby materials of course!
my new tool case
my new tool case.
The case has three foam inserts that I cut out spaces for the respective tools.
the top tray of my new tool box
The top tray houses my 'most used' tools, and these include my hobby knife, extra blades for it, my razor saw, the files, tweezers, and sculpting tools.

the middle tier of the case.


The middle tear houses my green stuff, milliput, ticky-tack, glues, magnetic probe, and accelerent.


 Finally the bottom teir of the case:
the bottom tier of the case
the bottom tier of the case   
The bottom tier houses an assortment of clamps, hole punches, my utility knife and my caliper.
So now rather then having the majority of my tool shoved hap-hazardly into a drawer I have a nice case with individualized slots for many of my tools.

I've also been experimenting with resin casting and mold making. Remember that Thunderhawk I'm working on? Yeah... rather then build 4 weapon mounts, 2 separate engines, 2 pilots seats, and an assorted over pieces multiple times... I'm looking into the process of making one master version of each type of part, making molds of the master and then casting the multiples of those parts I need.

I haven't gone into the mold making yet but I've been experimenting with pre-made molds, I have acquired over the years. I've made several groups of rocks that appear to be useful as base material.
a resin cast rock
It's a rock, Jim.
 One thing I am considering is modifying a future casting to include space for a AA battery pack and thus use it as the base for a model that will use LEDs to light up in some form.
If I space it properly, I think I can make it work:
comparing the size of a AA battery to a rock casting.