Sunday, October 02, 2016

The Undying Legion

This is a revisiting/revamping of an... ages old idea I had. I think I originally had this idea back in 4th, maybe 3rd edition. But it was back when "Legion of the Damned" didn't have official rules. So I had an idea to do a Legion of the... Legion of the Damned. Same general imagery as the LotD, lots of skulls and flame imagery. Almost no vehicles, all foot slogging, and silent save for the cry of the bolters and the crack of enemy skulls!

So the revamped idea is a bit more like the Black Templar in temperament, the undying loyalty and commitment to eradicating the enemies of the Imperium, even beyond death! Screaming from the skies comes the skull heralds of the legion, appearing to plow into the ground yet incurring no damage and hovering over top of the ground when the smoke clears. Hauntingly, the Legion then appear about the ghastly totem to bring the devine and fiery wrath to the enemies of the Imperium of man! So far I just have a couple little random bits for the army. But... here they are!

So surprise, surprise Halloween is coming up so lots of skulls for sale for super cheap. I was walking through Target when I found a bag of smaller skulls and larger fist sized skulls. Well this reminded me of my Undying Legion idea. So I grabbed some!
One of the first challenges was on the back of the skull, where in very predominate raised text it spelled out the various forms of "Made in china". That had to go. Started with an exacto blade and shaved off the raised letters. Then I came back with sand paper. I started with 600 grit and then moved onto 1200 grit. I wanted to keep the damaged and worn sort of look so I didn't want it perfectly smooth.

One of the first challenges was on the back of the skull, where in very predominate raised text it spelled out the various forms of "Made in china". That had to go. Started with an exacto blade and shaved off the raised letters. Then I came back with sand paper. I started with 600 grit and then moved onto 1200 grit. I wanted to keep the damaged and worn sort of look so I didn't want it perfectly smooth.


One of the defining images I had in my mind for this army was the idea of skulls that come screaming down from the skies, come to 'land' in a big plum of smoke and dust and then only as the dust settles do the enemy first catch a glimpse of the Legion forming ready for battle. So these larger fist sized skulls are going to be the 'counts as' drop pods and will be modeled on bases to be hovering above the ground.

Saturday, October 01, 2016

The legion is born...

This started as a random idea while I was doing a live stream one night. I was working on some Raptors when I had an idea for a Sorceror. So I went to work on the Sorcerer who has become known as Arian. The idea grew into being a Sorceror who has found a new way to produce new semi-chaos marines. In agreement with the Dark Magos Varagos, Arian takes bronze statues cast in the form of Chaos marines and puts the souls of his most 'loyal' thralls into them, casting powerful spells to animate the otherwise dense and un-moving bronze. By doing this he is able to create resilient, powerful warriors on par with most Chaos Marines with out the resource commitment normal Chaos Marines require. They are not perfect constructs as the souls exist in a sort of phase and they may be slow to react to the real world. Short version: These guys count as Thousand Sons!

 The Sorcerer himself in the making! Built on the base of a Dark Angles robed body with a chaos marine front torso, I used green stuff to build up an over robe and then cut off the handing bars from the Tzeentchian icon from the Chaos Space Marine box set and attached them to the front of the robe. Ultimately there will braiding that attaches to the bars so they are handing off his shoulders rather then hovering there. The arm is the icon bearer arm while the staff is from the Terminator Lord set.

In order to swap weapons and options I put a magnet in Arian's shoulder. The helmet is a Warp Talon's with the... erm... the antlers? carve down and smoothed out to give it more of a corrupted mark 3 helmet sort of look.

I once again used a pre-cast base from Dragon Force for my Brass legion. In order to help with painting, I put magnets in the feet of Arian so I can remove the model from the base to paint the base as needed.


To show his obsession with souls, I'm going to have a series of skulls hovering over his backpack. So I added 2 more exhaust vent arms, turned the vents upward, and pinned a skull hovering a couple millimeters over the exhaust vent. I'm going to come back with green stuff and add in flames. It's the same idea that I'm going to do with the heads of the Bronze Legion members themselves. Basically the idea is when the souls were infused into the statues, the heads of the statues shatter and a floating flame wreathed skull is the head of the marine.


The first couple members of the Brass Legion! To show the relative low quality of the statues, I added damage to the models. In the legs what I did was drill up into the leg with progressively larger drill bits until I had largely hollowed out the leg. Then I put a drill through the leg adding a hole, then came in with an exacto blade to rough up and break the holes. To help carry the idea of soul animated statues, I'm thinking about priming the model in 2 stages, the spaces inside the army and the neck and gorget will be primed in white while the rest of the armor is done in black. the areas that are white will be done up in bright blues and greens while the rest of the armor will be done in the darker bronze color. So... here we go.


Friday, September 30, 2016

Yeah I'm still alive

Hey all. I know I haven't posted on here in a while. Live has been life and I've learning at least the basic ins and outs of streaming so the time has really gotten away from me. But I am still alive and I am still working on various projects. Depending on how you look at it I'm covering them in more detail by streaming. See, I can just record my live stream and then load it up to YouTube. Now I highly doubt anyone will actually sit and watch the entire live stream, but the information is there and it helps to provide a record for me that I can go back and review when I type information up. For easier organization I've begun assembling the various recorded live streams into play lists.

This live stream is of me building the Marauder bomber in paper-hammer form. Well Cardboard form


This playlist is of the Chaos play through of Dawn of War: Dark Crusade I did:


Then we have my project reviews. These aren't live streams but if you want some quick overviews of prior projects, this is it.


Friday, July 29, 2016

Paper hammer research project

So I'm going to put together a series of videos about scratch building with the first section of the series talking about Paper crafting, or more commonly known as paper hammer in our circles. As a prep for the project I'm doing a bit of an exploratory project to build a paper-hammer baneblade, that way I can make the mistakes, and find the screw ups, make note of them and address them in the finished project. So here's my progress on the exploratory or as I call it "This is what I screwed up!" As a bit of fellow-40k blogger support, and credit where credit is due, I'll be pulling a lot of references from Virtual Stranger's blog "In The Grim Cheapness of the Future...". He completed a paper-craft build of a plague reaper based on the same plans I'm using for the BaneBlade. He chronicled much of his work and much like myself, he believes in showing people his screw ups so others can learn from them. So now I'm the one making the screw ups and you get to learn from my screw ups.

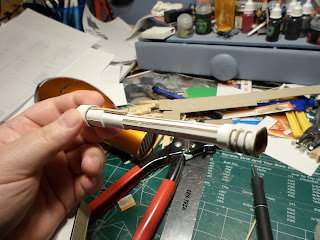
The Lascannons were actually the first parts I built for this project. I had a brain storm about how to go about building them. By rolling strips of cardstock that have been saturated with white glue around the body of a tooth pick and then rolling additional pieces to affect the extra details. Then affixing pieces of cardboard for the under barrel support and muzzle. This allowed me to build up details and get that more unique Lascannon shape and design. Overall, I am pleased with how the lascannons turned out.

The next part I worked on was the main body with the demolisher cannon. The cannon doesn't move sadly. Perhaps in the next version. This is an example of one of the things that the plans I'm working from leaves out. There are no plans for the demolisher cannon beyond the side mounts. The back of the mounts, the cannon, the barrel base, none of them are in the plans. So I have to design them myself.

I could see that the major join between the forward hull and the upper hull was going to be a critical point of connection. So in order to reinforce that added extra layers of cardboard to the connecting planes and added braces on the under side of the turret mount.

The mounting for the main turret was a bit of a challenge for a couple reasons. Firstly because there isn't any sort of mount in the plans. You just have the turret, and then you the upper hull. Nothing to really mate the two together. So another part I needed to design and build myself. What I did is I measured out a circle that would fit inside the space for the turret, it turned out to be about 5cm in diameter. Using a little geometry I cut a strip of cardboard that would roll up to be a tube with a diameter of 5cm. I rolled it up to form that tube, then glued a cap on one end of it. To help reinforce the tube I added cross bracing inside the tube. Then I put a lot of white glue into it and allowed that to dry for a couple days.

A nice trick I found for when you need to make something round you can cut a series of shallow cuts across the width of a piece of cardboard, you can more easily roll it into a tube. In this case each cut is 4mm after the previous.

I mounted a series of 4 sheets of cardboard in the bottom of the upper hill section all with the 5cm hole cut out to accept the mount for the upper turret. By layering the cardboard like this it greatly increases the strength of the part.

upperhull base


Always such a challenge finding ways to hold parts together while glue dries.

The finished upper hull and the main turret mount. Turned out really well if you don't mind my being a bit boastful.

The main cannon. This one I'm rather proud of. See it's built in layers. The first layer is a length of Cardboard 8cm long with 3mm shallow cuts made down the length to allow it to be rolled up. With that innermost portion built I then cam back and rolled lengths of Cardstock around the base of the barrel and the end of the barrel. I them added a second layer of cardstock, but shallower then the first, over top of the layer at the base. Then I added one more layer of cardstock over top of that. I came back and added some barrel bracing with thin strips of cardboard. I then designed the barrel vent piece for the front of the barrel. Was a royal pain to cut out the vents. I have to use only the sharpest and newest blades. I wound up using 4 blades to cut that one piece out.


Here's the main body with the demolisher cannon, twin-linked heavy bolter turret, and main turret. Somehow it looks like some sort of boat to me at this stage.


And then come the tread assemblies. This is a part that isn't 'in' the plans exactly but if you get creative you can get them from the plans. I then had to cut out all that circles. Was rather tedious.
Stranger actually pointed out how to build the treads from the plans for the Baneblade, even though there aren't any plans for parts to build the tread assemblies.


And... somehow I thought it was a good idea to make 64 links like this. Why?

Monday, April 11, 2016

Shen-long Gundam

So I picked up a 1/100 scale XXXG-01S Shenlong Gundam at Hobby Town a while back, not for any specific reason and in all honesty I'm not really a fan of the mech. Even in the world of Gundam Wing (yes that is the Gundam Series that gave us a Mecha with feather wings), the Shen-long struck me as being too fantastical and impractical in the real world. Still, for $12 can't complain too much. The model seemed like a good option to practice air brushing on. I know the model, having built it back in the early 2000s. It's mainly primary colors so the paint should be easy to match up.

maverike_prime's 1-100 Scale XXXG-01S Shenlong Gundam album on Photobucket

Update (4-11-16): At the time of this posting, I've had to put the model on hold. I've lost several parts and can not build the rest of the model with out them. I have ordered a second model off ebay, but until that comes in I can't work on the model much more.

Thursday, March 24, 2016

Just a heads up

Hey all, I know I've been absent a bit of late. Time and life and all that have been taking me away from the hobby for a bit. But I do have an announcement to make. I am in the process of setting up a weekly stream for my hobby work. Right now I'm shooting for my first broadcast to be April 16th. I don't have a lot of details for the stream just yet like weather it will be done through Twitch.tv or YouTube.com for instance. I'm considering both options, but will ultimately select the service that best meets the needs of the information I wish to present to my viewers. So keep your eyes pointed here for updates on my incoming stream.