So, first up are the molds I've made.
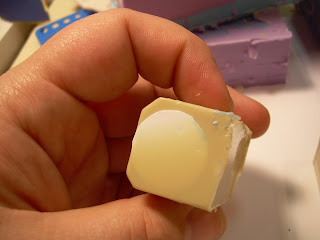
That is a series of 6 molds I've created over the last few months, using various approaches, materials and ideas. Here's the differences between each:
This is actually the first 2 part mold I made. As you can see I made it so I could cast up 4 hellfire missiles at a time and one Ork twin linked big shoota. I was intending to use the shoota as the basis for my Chaos Thunderhawk Hunter guns, but alas my first attempt at a two part mold was somewhat flawed and the clay I used in the process turned into a sticky gum when I used the mold release agent on it. This mold was made using Smooth-On's Oomoo-30 Silicone Rubber kit.
This is the second attempt I made for a hell fire cast. This rubber is Smooth On's PMC-121. This rubber has the advantage of being much denser and thus stronger and more rigid and thus better at grabbing details. The down side? 16-20 hour demold time. That means once you pour the rubber, it's a day until you can pull the mold up. Making a 2 part mold? Don't expect to be able to use it with 48 hours of starting to make the mold.
These molds are of the various parts for the thunderbolt. The molds at the top are the engine mounts and the intakes for the engine. To save time I made 2 molds of each so I could cast up the pair of each part I needed in one go.
The wing mold... oi vey as this thing ever been a pain in the butt. See here's the thing. In the final wing I want to have magnets in the bottom of the wing Pylon so I can attach hell fire missiles or fuel pods to the model. So I want to be able to put the magnets IN the wing pylons when I cast the wing. Well there's no way I can cast the pylons, and the wing at the same time. So I have to spray down the mold with release agent first, then cast the pylons and let those set till at least stiff and not runny. Then I have to close us the mold, and cast the rest of the wing. And what happens if any part of the process has a problem or isn't done correctly?
This!
So what do I do? I have to be VERY patient and do each step correctly each time. Roughly it will take me about an hour and half to cast the wing properly.
Like this one:
The rest of the casting results depend largely on my patience when I cast the part in the question. The exception to this are the engine intakes and the engine mounts.
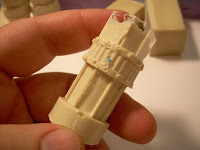
The engine mounts likewise turn out well easily enough. To reduce the weight, and the amount of resin I need for each I submerged sealed styrene tubes in to the resin as it's setting. You can see one of the tubes in the above picture. This effectively makes the part hollow with needing to make it a multi-part construct. Again, just need a little clean up to make the piece workable.
The Engine itself as been a trying expirament:

Oh yeah, the engine has proven to be the most difficult large piece to cast. Because of the small details on it, the resin tends to "bubble"
over the details and then dry, leaving a void in the finished piece.
You can this in the first couple attempts. So how have I solved this?
Simple. Patiance. Namely instead of trying to cast the entire engine in
one single go I try to cast in three steps using less resin and poring
the resin very slowly at each step.
In this lastest effort I did it in three passes, pouring about 1/2 ounce of resin each time, pouring it along the shaft of a stir stick and trying to keep it the pour rate to a very shallow thin stream in order to give the resin time to spread out and fill in the details on the inside of the mold. Still need some clean up on the finished piece but a substantial improvement over the earlier attempts.
The small tiny details on the weapons have been an absolute nightmare to overcome and honestly I haven't quit gotten them beat yet. Much like the small detail on the engine, the resin as a tendency to bubble up and fill the mold of the smaller pieces creating these large gaping voids ruining the part.
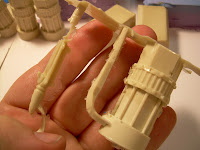
This is the most notable example of this particular problem. Where is the rest of the Lascannon? And why is the body of the hellstrike Missile hollow? Yep, that bubbling problem at work again.
This casting was notably better but still has a hallow body to the lascannon. I MIGHT be able to use this one. Have to look into it more closely.
This is actually the best casting of those parts yet. YES it has a metric crap ton of clean up on it but guess what? All the of parts and pieces are there! So that's a win.
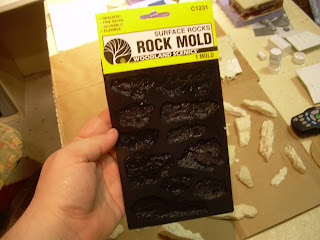
Why? So that if you have an extra 1/2 ounce of resin you don't waste it. Spray this rock mold with some mold release and pour the extra resin into the mold. Just save the extra rocks in a box. You can use the rocks for basing or other terrain projects. You'll look into the box at some point and go "Holy crap! That would look great for my [insert model name here] as a base!" or something of that nature. And you'll wind up with plenty of them in a hurry too.
Same thing works if you're using green stuff and have some extra. Press the extra into the rock mold. Viola! You've got a rock you can use for basing or detailing.


Fantastic idea with the rock molds. It drives me nuts whenever I work with green stuff and end up with that last big-pea-sized lump that I don't know what to do with.
ReplyDeleteParts look great. Can't wait to see them go together.