Sunday, June 16, 2013

Branching out

So I've decided to branch out a little bit and start looking at my Chaos force. The one that's been sitting on my shelf basically ever since I got the Dark Vengence box set. Rather sad really that it's sat there this long. But I'm looking at it again. We'll see where it goes.

One unit I want to add is a unit of Thousand Sons, but I don't like the standard GW models for them. And honestly I have intentions of fielding something all together... a bit more insulting. I've built this particular idea once before so I'm looking at returning to it.

lobotimized space wolves being used as Thousand Sons marines.
These are the original version I built a couple years ago.
Yes, those are space Wolf models. Here's my idea: Captured marines are turned over the Dark Mechanicum where they are lobotomized and rebuilt into heavy company servitors with the extensive use of Bionics. Stick a dark Techno Magos of some form with the unit as the Sorcorer and I think I'll be able to use them as count-as Thousand Sons.

I've been looking at different options for bionics, mainly from third party companies. I think Anvil industries has the answer I'm looking for in their armory.  By combining their various bionic pieces with a Space Wolf kit, add some battle damage, and paint 'em up in Space Wolf colors... I think I'll need to watch my back around Wolf players. If the twisted irony of Space Wolves being controlled wasn't bad enough, I think the irony of using Space Wolf models in a counts as Thousand Sons unit will require some measure of vengence be taken.

Saturday, June 15, 2013

New Drop pod for a new list

So I've managed to get a couple games in against a friend and I think I'm getting a better handle on how I'm going to run my Space Marines. I've come up with a 2k list I'm calling the Iron Wind fall.

HQ-
Space Marine Captain on Bike with Relic Blade, HellFire Rounds, Melta Bombs

Troops-
10 man biker unit with a Multi-melta armed Attack Bike

10 man biker unit with a Multi-melta armed Attack Bike

5 Man Scout Squad W/ Telion
-4 Sniper Rifles
-1 Missile Launcher

5 Man Scout Squad

Fast Attack-
2x StormTalon Gunship armed with Skyhammer missile launchers

3x- Landspeeders W/ 2 heavy bolters each

Elite-
3x Iron Clad Dreads with Seismic Hammer and Meltagun, 2 HK missiles and Hurrican Bolters in Drop Pods.

Fortification-
Aegis Defense Line with Icarus Lascannon

My plan is to put the Telion Scout squad in the Aegis defense line, that way I can use Telion to control the Icarus and thus get BS 5 against enemy flyers while his Camo cloak will give the Scouts a better cover save. My biker squads and Captain move forward hitting the enemy in concentration. As the Dreads become available I'll drop those in behind the enemy lines causing a pincer between the bikes and the dreads while the 2nd scout squad follows behind to grab another objective.

At least that's my plan anyway. We'll see if I can actually pull it off.

In the mean time I am building the list. I've already built the Bike Squads, the scouts, one Ironclad and one drop pod. Now I'm working on the second Drop pod.

Drop pod base assembled and painted
The base, painted and assembled.
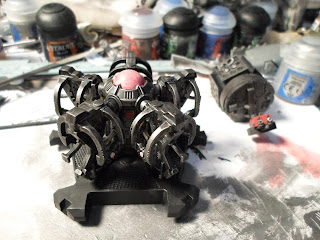
 Thus far I've been working on the internal sections of the drop pod. A solid black base coat followed by a healthy dry brushing of bolt gun metal with a wash of Nuln oil works well as a machine base for the drop pod. I tried to paint the center console like it was glowing red indicating that it was time to deploy. I figure as a drop pod comes smashing down from the sky, the indicators inside it will flash red when it his ground and the marines come charging out.
the upper section of the drop pod assembled and painted
The upper section of the drop pod.
 I picked out some of the details in the upper engine in Runefang steel and then back and washed those details with nuln oil.
The parts of the new drop pod next to the previous drop pod.

Friday, June 14, 2013

Some busy work... sort of

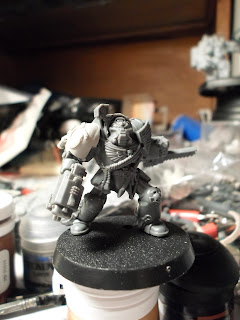
Okay, so I got a little bored and started rooting around my bitz boxes. I ran across a pair of Dark Vengeance Terminators and some Forge World Ultramarine terminator shoulder pads. So I thought "Hey why not? I'm a good converter. I bet I can convert these Dark Angeled Termies into Ultramarine Termies.

Here is the first one. I had to carve down the shoulder so it would allow the Forge world shoulder pad to fit on it.
 added an ultramarine shoulder pad

I had to rebuild some detail around the chainfist
 The chainfist was adorned with very Dark Angel-ly iconography so it had to go. Only problem was that same iconography was laying across the cable going to the chainfist so I had to re-craft that lost segment. I used a segment of wire with the insulation cut into segments. Surprisingly it worked out really well.

I converted the Dark Vengence Terminator to be an Ultramarine
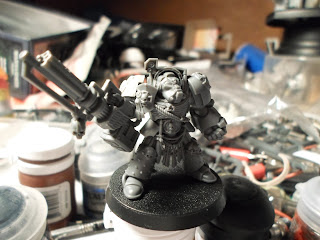
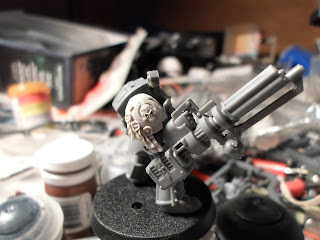
The assault cannon armed terminator was a bit more of a challenge.  The amount of small details on the model made it difficult to effect any change quickly and I found myself having to work very slowly over an extended period of time for little noticeable change to the model. The best example of this approach is the feathers that had previously hung under the body of the assault cannon. I didn't want to have to rebuild the under carraige of the cannon so I went for a minimalist modification and only removed what I had to. In this case the feathers on the cannon. I decided to keep the hanging skull as decoration. 

For the moment I am leaving the hanging sword icons between the legs (that sounds like a dick joke just waiting to happen) simply because I can't easily remove them with out being forced to replace them with something else. Which I may do. I might add some purity scrolls or perhaps a different tabard.

The Dark Vengence terminator with the Ultramarine shoulder pad

Tuesday, June 11, 2013

Update on the Helbrute

So I haven't had the chance to give a proper update on this particular project. My model builder Attention deficit disorder as been kicking in a lot lately as you can see so I've been jumping from project to project almost with out pause for the last week. But the Helbrute is shaping up as you can see.
Chaos Helbrute converted to have 2 power fists
Chaos HelBrute with 2 Power fists
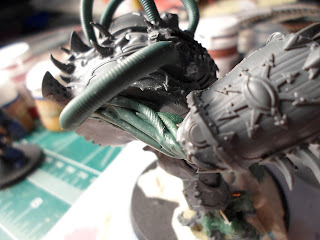
 I've begun attaching hoses, made from Green Stuff using Green Stuff Industries Tentacle Maker, to the crown around the face that had previously sported horns. It's my hope that by adding these hoses to the crown it will make it look like materials and psycho-tropics are being pumped into the body of the warrior at the heart of the Helbrute driving him on in his rage.
A close up of the converted HelBrute's face showing the cables coming off the crown
A close up of the HelBrute's face showing the cables coming off the crown
 I still have a moderate amount of work to do on the monster, not the least of which is making the three remaining tubes and fleshing them out into the body. That way the tubes will look like a part of the body and not just something that was stuck on.
I had to resulpt the muscles on the arms of the helbrute
A close up of the Musculature of the left arm.
 When I removed the arms I had to resulpt the muscles connecting to the shoulders.
I had to resulpt the muscles on the arms of the helbrute
The musculature of the right arm.
I Will need to make a new should pad for the right arm.

Monday, June 10, 2013

revamping the StormTater... er StormTalon

Okay so I've been experimenting with the Storm Talon in my army lately. I still hate the model but it's performance has been really good, too good to ignore so I'm going to build a squadron of three of these birdies. But I hate the model. So what am I going to do? What any sensible converter would do: Re-make it!

Here's why I'm posting. Feed back and suggestions for where and how to go about accomplishing this. I'm leaning toward something more like a cross between the Apache helocopter and the Banshee Bomber from StarCraft II.

Visual references for those who do not know what I am talking about:
AH-64D Apache Attack Chopper

Banshee Bomber from StarCraft 2
So, those are the two craft I like parts and pieces of and want to draw from to craft a new version of the Storm Talon. So I went into Photoshop and started working on it. I began with the Banshee, thinking I could take the paper-craft models I've seen around the net and modify them as needed.
Version 1 for a revamps Storm Talon based on the Banshee from StarCraft 2
Version 1 for a revamped Storm Talon


So I extended the tail rotor, and added the Talon's engines. It's an OK start but I feel like I'm loosing too much of the Space Marine in this approach.

So I started working with the Talon itself:
Version 2 for a revamped StormTalon based on the actual StormTalon model from Games Workshop
Version 2 for a revamped Storm Talon
 And did the first obvious thing: Extended the tail. Okay that helps a fair amount, but there's still more to accomplish with it. So I continued working and came up with what I'm calling Version 2.1:
version 2.1 for a revamped Storm Talon model this one with a different Assault cannon style
Version 2.1
 I like the smaller assault cannon and pairing it with some sort of scanner array, I think I can get away with calling it Twin-linked. But this didn't work for me. So I went to the Apache for reference and started looking at a couple things.
version 2.2 of a revamped model for the StormTalon this time with a tail roter and gimble mounted assault cannon.
Version 2.2

Which gives rise to Version 2.2. Still keeping the smaller assault cannon but and mounting it more or less where the huge clucky Twin-linked one was. I'm going to build a better mount for it, one that will allow the entire weapon to rotate and elevate more like what's on the Apache. I want to build the nose so it has the 2-axis rotational sensor array in it like the apache but I wasn't sure how to accomplish that with the drawings. Definitely getting closer to that "attack chopper" feet with it but still not there so I went back to Photoshop and continued working on it.

version 2.3 for a revamped Storm Talon now with a re-designed nose, sensor array, and landing skids.
Version 2.3
I fixed the tail so it wasn't so massively huge and re-designed the nose to accommodate a different style of sensor array. I added the landing skids but I'm not sold on them. I could also just have the skids in a retracted fashion, like the mounting arms retract up into the main body when the Talon's in flight.

But that's roughly where I am now with my design work on it. Thoughts? Post 'em in the comment.

Sunday, June 09, 2013

trying the newer GW paints

Okay, so I decided to take the plunge and give the current GW paint line an honest go. So I grabbed one of their painting tutorials, this one for Ultramarines, and grabbed the paints it listed for the model. Those paints included Macragge Blue, Abaddon Black, Rhinox Hide, IronBreaker, Drakenof Nightshade, Nu;n Oil, Etherium Blue, Altdorf Guard Blue, Calgar Blue, Runefang Steel, and Guilliman Blue. I managed to assemble a terminator from the Dark Vengence set and set to work.

An abaddon Black prime coat went on the model. Then I based the model in Macragge Blue for everything that was going to be blue, Iron breaker on the metallic parts and Rhinox hide for the leather pieces.  I then went over the blue with Drakenof Nightshade, and applied Nuln Oil to the metal area. Dry brushing a layer of Etherium Blue lightened this up very well. I then used Calgar Blue to layer up the blue sections, and RuneFange steel on the metals. The Altdorf Guard blue provided a final blue shade. I then applied the Guiliman Blue glaze to the model. Over all, not bad.

The Nuln oil is basically Badab black while the Abaddon black seems a bit thinner then Chaos black was. The Drakenof Nightshade is a fantastic darkening shade for blue. I'm rather amazed at the Etherium blue dry compound. It makes a huge difference and I will be experimenting with the GW dry compounds.


Saturday, June 08, 2013

YAH BITZ!

Okay so with GW declaring war on Bitz sellers a lot of companies are just flushing all their bitz supplies. One of them is Spikey Bitz and I took advantage of that to order a hand full of their "SUPER Fat Sack O' bits" bags. Well they came in today. So I have more bits!!!

Thus far I've only found a couple full models in the bunch, largely from the Dark Vengeance set. But hey, bits is bits!


Friday, June 07, 2013

Dark Lance Designs

I ran across these guys at my gaming store about 2 months ago when they were talking about their plans to produce a terrain set of corridors and rooms that could be used to build the maps of a space station, underground bunker, space ship, ect. Initially I was intrigued and said "Hey keep me informed." Well now they've launched their kick starter to get the project going. They have a couple demo sets completed that they are taking around to hobby centers to show off to drum up interest in the product. I got to see it last night. I WANT! I figure I can't possible be the only person who will want these products so I'm spreading the word about Dark Lance Designs.

 Facebook Page              Kickstarter page


I'm  definitely going to be tossing a couple bucks their way. Those corridors look REALLY good.


Saturday, June 01, 2013

Quick update

Okay I meant to post this a couple days ago but time got away from here so I'm going to post this super quick before I run out of the door. I finished assembling the bike with the LED in it:
A space Marine bike with an LED installed in the head light
Here you can see it with the LED on and off.