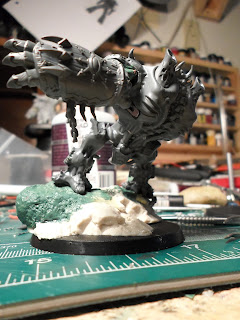
I'm also going to modify the post of the model to have the left power fist drawn back and the right one cutting across the chest like the Brute's about to swing back against an attacker with it's burning left.
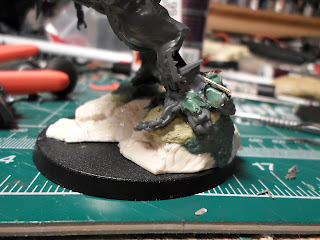
But here you can see the finished base and the circuit. I used green stuff to seal off the switch and the junctions in the body. This helps do a couple things.
First it cements the switch in place so that there is no wiggle room.
Second it holds the connects in place so there's no chance of them coming loose later on.
I've spent a lot of time and effort on the base of this model so I'd like to talk about it. Here you can see the dime battery and holder in the base of it. In order to accommodate the battery I attached a large resin rock formation to the base and then went in with a dremel to bore out a depression. This was a very time consumming process particularly because I had to make sure I was doing it in a sealed room, with a good vacuum to catch the shavings and resin dust. In short, I took over my fathers workshop, stuffed a towel under the door jam, hooked up a vacuum that has a hermetic seal on it and put the hose right next to where I was going to be working and then set up a fan behind me to blow the dust into the vacuum hose. Just to be safer I used gloves, a respirator, a mask sealed with petroleum jelly, and head phones. I felt a little like I was wearing a space suit or something.
In order to mount the HelBrute on the base I had to build up the rock face with some flater ares for it to stand on. So I used some of the rock facings I've made with extra green stuff over the last few months and attacked them to the resin rock with super glue. Then I went in with plumbers putty and filled in any spaces between the resin rock and the green stuff rock facings. Once the putty dried I went in with green stuff and put down a layer. I then took several rocks and textured the green stuff with them. Over all I like how it turned out.
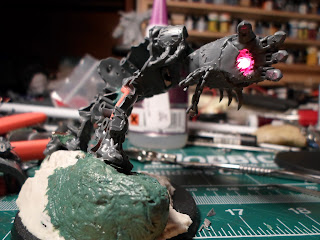
And here you can see the light in the fist.


0 comments:
Post a Comment