Okay so I've been experimenting with the Storm Talon in my army
lately. I still hate the model but it's performance has been really
good, too good to ignore so I'm going to build a squadron of three of
these birdies. But I hate the model. So what am I going to do? What any
sensible converter would do: Re-make it!
Here's why I'm posting. Feed back and suggestions for where and how
to go about accomplishing this. I'm leaning toward something more like a
cross between the Apache helocopter and the Banshee Bomber from
StarCraft II.
Visual references for those who do not know what I am talking about:
Banshee Bomber from StarCraft 2
So, those are the two craft I like parts and pieces of and want to draw
from to craft a new version of the Storm Talon. So I went into Photoshop
and started working on it. I began with the Banshee, thinking I could
take the paper-craft models I've seen around the net and modify them as
needed.
Version 1 for a revamped Storm Talon
So I extended the tail rotor, and added the Talon's engines. It's an
OK start but I feel like I'm loosing too much of the Space Marine in
this approach.
So I started working with the Talon itself:
Version 2 for a revamped Storm Talon
And did the first obvious thing: Extended the tail. Okay that helps a
fair amount, but there's still more to accomplish with it. So I
continued working and came up with what I'm calling Version 2.1:
Version 2.1
I like the smaller assault cannon and pairing it with some sort of
scanner array, I think I can get away with calling it Twin-linked. But
this didn't work for me. So I went to the Apache for reference and
started looking at a couple things.
Version 2.2
Which gives rise to Version 2.2. Still keeping the smaller assault
cannon but and mounting it more or less where the huge clucky
Twin-linked one was. I'm going to build a better mount for it, one that
will allow the entire weapon to rotate and elevate more like what's on
the Apache. I want to build the nose so it has the 2-axis rotational
sensor array in it like the apache but I wasn't sure how to accomplish
that with the drawings. Definitely getting closer to that "attack chopper" feet with it but still not there so I went back to Photoshop and continued working on it.
Version 2.3
I fixed the tail so it wasn't so massively huge and re-designed the nose to accommodate a different style of sensor array. I added the landing skids but I'm not sold on them. I could also just have the skids in a retracted fashion, like the mounting arms retract up into the main body when the Talon's in flight.
But that's roughly where I am now with my design work on it. Thoughts? Post 'em in the comment.
Okay, so I decided to take the plunge and give the current GW paint line an honest go. So I grabbed one of their painting tutorials, this one for Ultramarines, and grabbed the paints it listed for the model. Those paints included Macragge Blue, Abaddon Black, Rhinox Hide, IronBreaker, Drakenof Nightshade, Nu;n Oil, Etherium Blue, Altdorf Guard Blue, Calgar Blue, Runefang Steel, and Guilliman Blue. I managed to assemble a terminator from the Dark Vengence set and set to work.
An abaddon Black prime coat went on the model. Then I based the model in Macragge Blue for everything that was going to be blue, Iron breaker on the metallic parts and Rhinox hide for the leather pieces. I then went over the blue with Drakenof Nightshade, and applied Nuln Oil to the metal area. Dry brushing a layer of Etherium Blue lightened this up very well. I then used Calgar Blue to layer up the blue sections, and RuneFange steel on the metals. The Altdorf Guard blue provided a final blue shade. I then applied the Guiliman Blue glaze to the model. Over all, not bad.
The Nuln oil is basically Badab black while the Abaddon black seems a bit thinner then Chaos black was. The Drakenof Nightshade is a fantastic darkening shade for blue. I'm rather amazed at the Etherium blue dry compound. It makes a huge difference and I will be experimenting with the GW dry compounds.
Okay so with GW declaring war on Bitz sellers a lot of companies are just flushing all their bitz supplies. One of them is Spikey Bitz and I took advantage of that to order a hand full of their "SUPER Fat Sack O' bits" bags. Well they came in today. So I have more bits!!!
Thus far I've only found a couple full models in the bunch, largely from the Dark Vengeance set. But hey, bits is bits!
I ran across these guys at my gaming store about 2 months ago when they
were talking about their plans to produce a terrain set of corridors and
rooms that could be used to build the maps of a space station,
underground bunker, space ship, ect. Initially I was intrigued and said
"Hey keep me informed." Well now they've launched their kick starter to
get the project going. They have a couple demo sets completed that they
are taking around to hobby centers to show off to drum up interest in
the product. I got to see it last night. I WANT! I figure I can't
possible be the only person who will want these products so I'm
spreading the word about Dark Lance Designs.
Okay I meant to post this a couple days ago but time got away from here so I'm going to post this super quick before I run out of the door. I finished assembling the bike with the LED in it:
So I found myself the recipient of what is probably the single best time off arrangement I can: 2 days off, 1 day of work followed by 2 more days off. Why is this such a good arrangement? Simple. I get 2 days to myself, to work on my stuff, and then just as I'm getting a little bored of my own projects.... boom I have a day of work that acts as a re-set on my own personal projects and then I have 2 more days to work on my stuff. So what have I been working on? Well several things.
Yeah I stuck a bunch of wires in a bread board.
No I've done more then just that. I'm working on a new captain on bike for my Blood Ravens but I'm feeling ambitious so I'm going to wire it up so the head lamp in the bike will light up. Which means it needs power. So using the Heroic Urban rubble bike base, available from Dragon Forge Studios, I took a dremal to the bottom of it to carve out a space for a button battery.
I messed up the messurements and didn't make the opening deep enough to account for the battery clip and the battery itself. So I added a 2mm thick sheet of styreen to the bottom of the base to account for it. All in all I think it helps because I'll draw more attention to the captain who should look more heroic and stand out.
I drilled out the head plate for the ferring and was going to mount the LED in it but then discovered the white LEDs I have are 5mm and 10m, not the 3mm side I need for the mounting. So I'll have to pick up some 3mm LEDs to continue working on this.
Since the bike is going to be attached to the base, and have wires running through it, I specifically went in and glued the wheel halves to the body and then carved out too spaces in the back. one you can see at the front of the rear tire. This is for the wires to come back through the body and connect to the switch in the back of the body. The second space you can just barely see at the top of the rear wheel. That's going to be where the switch will be installed.
Something else I've been working on: My Blood Raven's land speeder detachment! Here you can see the 3 of them:
I installed magnets in the noses and in the turret bases of the weapons so they can be swapped in an out.
Allowing me to field them with heavy flamers or assault cannons. I need to build the under slung heavy bolters and magnetize those as well.
Oh and here's some good news: My pressure pot is set up and working! So now I can start working with pressure casting and hopefully begin producing better pieces for my projects. Or I will be once I get the resin and silicons that will work with pressure casting.
So
I'm putting together a pressure pot for resin casting. The idea is you
use air pressure to 'crush' bubbles out of resin and silicon to make
more details molds and casts. As I had previously mentioned, resin is a thick material even when it is in it's liquid form it's still quit thick and thus the resin itself can support some weight. When it comes to casting parts, this gives rise to the 'bubble trouble', ie bubbles in the resin ruining the details in the cast part. So by crushing the bubbles out of the resin, and the mold rubber when making a mold, I can in theory correct that problem.
So I did my research, found a good
pressure chamber that rated for about 90 PSI, for about $125. Had to buy
a coupler for for about $3. Bought a compressor for $190. Needed to add
a sealed cap to the chamber. That cost about $2. a $5 roll of Teflon
tape to seal up the connections and it looked like I was ready to go. I
hooked up the compressor, sealed the chamber and made a test run. I
watch the regulator gauge slowly rise. 5 PSI. 7 PSI. 9 PSI. 11 PSI...
Suddenly the safety valve pops. I look at the valve and think it might
have been caught on the compressor hose. So I empty the chamber, open
it, reapply some petro-jelly, seal the chamber, and start the
compressor. 2psi. 4psi. 6 psi. 8 psi. 10 psi. 12psi... POP goes the
safty valve. Yep, the saftey valve is bad. on a bot that is designed
and intended to withstand up to 90 pounds of pressure per square inch...
the valve pops at about 12 psi.
Okay, so I'm a dumb ass. I did all that work on the helbrute, building the LED circuit, installing the LEDs in the fists, boring out a comparment in a base for the battery, all the work to build up the base... and I totally neglected the fact that the circuit was going to need about 8 volts of power and the dime battery only supplies 3 volts... So... end result: The 4 LED circuit I had been intending to build has been cut back to a single LED in the left power fist.
I'm also going to modify the post of the model to have the left power fist drawn back and the right one cutting across the chest like the Brute's about to swing back against an attacker with it's burning left.
But here you can see the finished base and the circuit. I used green stuff to seal off the switch and the junctions in the body. This helps do a couple things.
First it cements the switch in place so that there is no wiggle room.
Second it holds the connects in place so there's no chance of them coming loose later on.
I've spent a lot of time and effort on the base of this model so I'd like to talk about it. Here you can see the dime battery and holder in the base of it. In order to accommodate the battery I attached a large resin rock formation to the base and then went in with a dremel to bore out a depression. This was a very time consumming process particularly because I had to make sure I was doing it in a sealed room, with a good vacuum to catch the shavings and resin dust. In short, I took over my fathers workshop, stuffed a towel under the door jam, hooked up a vacuum that has a hermetic seal on it and put the hose right next to where I was going to be working and then set up a fan behind me to blow the dust into the vacuum hose. Just to be safer I used gloves, a respirator, a mask sealed with petroleum jelly, and head phones. I felt a little like I was wearing a space suit or something.
In order to mount the HelBrute on the base I had to build up the rock face with some flater ares for it to stand on. So I used some of the rock facings I've made with extra green stuff over the last few months and attacked them to the resin rock with super glue. Then I went in with plumbers putty and filled in any spaces between the resin rock and the green stuff rock facings. Once the putty dried I went in with green stuff and put down a layer. I then took several rocks and textured the green stuff with them. Over all I like how it turned out.
Here you can see the switch under the arm to turn on the fist.
Well first off the good news. Gotten some interest in the Helbrute thread I posted. Disease on Bolterandchainsword posted an older pic of a Helbrute he was converting to have a power scourge.
It's a nice approach. I'm hoping he'll post newer pics as he explained this was a work in progress.
Next the bad news: I killed my first attempt. See the LEDs I installed run best on 3v of power. The Dime battery I was using provided exactly 3v of power. So no need to install resistors. Well until I went to test the circuit with a 9v battery and promptly blew out all three LEDs. :( So yeah. Bummer.
Now the better news: I don't quit. I ordered a half dozen Helbrute models on Ebay and have managed to get a fair amount of work accomplished on a HelBrute with 2 power fists with red LEDs installed behind the head and in the palms of the fists to represent the flammers.
So here you can see the extent of my work on the model thus far. Built and wired the base, though it still needs some green stuff work to fill in gaps. Built the two power fists, and carved up the body.
I'm going for a sort of "roaring in anger" sort of pose for it, a bit like this:
So I have to reposition the body and arms. The upper torso will be angled back and the power fists will be positioned outward relative to the body.
I'm also installing LEDs into the torso, and in the palms of the fists to get some lighting effects going on with the model.
Here you can see the left power fist with the LED illuminated. I'm also going to install similar LEDs in the torso to provide red illumination around the face.
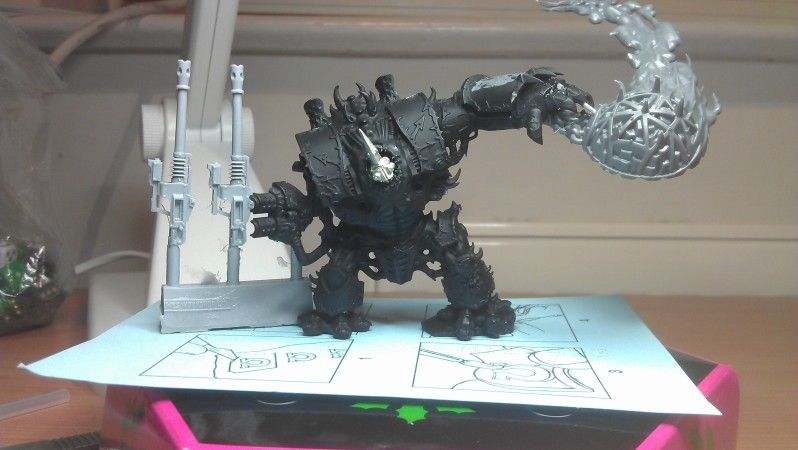
Now... here's the really annoying part of all this: The fact that I'm incapable of doing a simple easy project. Allow me to explain. Build a Helbrute with a different weapon load. Easy. Pose it in a new way. Okay, bit more of a challange. Install LEDs to light it up. Okay, don't see that too often. Now do all of that on the same model. Okay now we're getting into a challenge. See because the HelBrute is a snap-fit model, a large amount of the detail in it is modeled to accommodate it's pose. Which means in order to change the pose I have to change a lot of details.
The feet are a prime example. I wanted to model the HelBrute with it's toes clutching on the edge of the rockface. So I have to cut off the toes that will be in a different possition, and re-attach them in their possition. But to do that I have to make sure the base will work with the model. Which means building up the base UNDER the model itself. But wait I want to light up the model. So now I have to pass wires out of the base through the model. You see how I'm just compounding the challenge? Yeah. That's where it is.
So I had a crazy thought a few days ago, about building a bunch of HelBrutes but each converted for the different weapon load outs. There's considerable challenge in this approach, because I wanted to make the conversions from the actual HelBrute model. IE the one out of the Dark Vengeance starter set. Now I will absolutely admit that the HelBrute model is a really great model, as far as snapfit models go. It's got a lot of great details to it, but it's fairly static. There's just not much the model is designed to do. And by 'not much' I mean nothing. The model is designed to be what it is and nothing else. But then again there in lies the challenge.
So I posted my idea on Bolterandchainsword.com and got a couple responses from folks who were join me on the idea. So I've been working on my HelBrute, armed with twin-power fists with flamers.
Now myself being who I am it's not like I can JUST build a HelBrute with two power fists and call it a day. No no no. I have to push myself and add something to make it even more challenging. In this case it's electronics. In this case lights. I want to install an led in the palm of each fist and then another LED in the check so that there will be a red glow around the head.
The real challenge so far has been taking the left handed power fist and converting it to a right handed.
Okay, it seems like Virginia has FINALLY decided to give us spring time whether and with that has come temperatures that permit priming. Now I know this is going to sound a bit odd in relation to my most recent post where I said I'm largely done with Games Workshop products, but I still have a sizable stockpile of 40k miniatures waiting on my shelves to be painted. Many of them have already been built and I do intend to still play from time to time. So that's what I've been doing today, working on my ready stocks:
In this case I'm working on a drop pod and 3 land speeders. You can see the lower frames of the land speeders mounted on the tooth picks with the central computer console for the drop pod on the corner of the Styrofoam block. I only partially assembled the land speeders and mounted them on tooth pick this way purposefully to make painting them easier. Easier in that I can get at the interior details and then assemble. You can see the legs of the marines have been painted all the way down to the ankles.
I ran into one little hickup with the land speeders though and it is a minor one, though worth noting. See I got 2 single Land Speeders, and the Dark Angles Raven Wing battalion box set to get the third. Well the Land Speeder in the Raven Wing box is the older design of land speeders so I've effectively got two different models. It's not a huge problem, but it has created a few minor planning issues. For instance the newer version of the land speeder allows you to build the lower section of the entire Speeder body and then apply the top of the body to that. if you look at the land speeder body on the right you see how the seat backs are attached to the bottom of the speeder, but on the left the seat backs are attached to the top portion. Like I said, not a huge problem just an annoyance.
So far I've only managed to paint the central console on for the drop pod. Nothing terribly note worthy here. But worth the picture.
Now one other thing I've started working on, a new game. Does anyone know the Mobile suit Gundam franchise? Specifically the segment known as the "Universal Century" time line? Well if not here's the brief break down: Mankind has begun to colonize space with the use of space colonies. But after nearly 80 years one group of colonies have declared Independence and launched a war against the Earth Federation. Initially the Space colony had the advantage with the advent of mechanized war machines known as mobile suits but ultimately the Earth Federation caught up and developed their own Mobile suits. That war last about a year and the following series explored the fall out from that war.
Well I'm a big Gundam fan and I was watching the series 08th MS team the other day and it got my mind rolling about the idea of a table top strategy game based on that. Meaning you get a team of between 3 and 7 pilots, outfit them with your selected mobile suit, and then equip the suit with the various weapons and then you and your opponent each attempt to achieve your respective objectives. I figure you can use the 1/144 scale models to represent your mobile suit teams. it'd be a notable investment to get a basic team up and running, but $100 for a medium sized team seems almost non-existent when compared to hundreds of dollars you'd spend getting a 1500 point Space Marine army together.
I don't want to make it a Gundam version of 40k, I intend to make it a bit more complicated than that, but not up to the level of an RPG. Right now it's all in the conceptual stages and the only thing I've managed to accomplish so far is compiling a list of weapons from the first couple series with some rough notes about concepts and ideas that would apply to those weapons.
Okay, so GW has made a radical change to it's trade partner policies. I won't go into details about what the changes are. There are any number of discussions out there about them. I'm not going to get into discussions about the pros and cones about them. If you haven't heard about them, I suggest you check the MiniWarGamming response video to them.
What does this mean for me? Well it means GW products are basically not my first go-to option for modeling any longer. I'm sorry but the closest options for brick and mortar stores for me are 40 minutes north (2 hours if traffic is even moderately bad) and an hour and ten minutes south of me. I'm sorry. If GW is going to cut out 2/3 of their product line from the non-Gw stores and thus limit me to only online purchasing of them, then I'm going to move on.
So in the coming weeks I'll be looking into other games systems and see what I like. If anyone has any suggestions feel free to post some suggestions in the comments section. I will be upfront and tell you all that I'm not very inclined toward the gaming part of the hobby and am much more inclined toward modeling so the actual models that the company in question produces will be of much greater interest to me then the quality of the rules or gaming systems.
So I'm still here and alive. I know it's been a few days. As I'm so fond of saying "Life happens" Though I do have to say, I had this past Thursday off and I managed to do something I have not done in probably five years: nothing. I mean nothing productive. The most productive thing I did all day was get out of bed and shower. I didn't have work, I didn't do any work on my school projects, I didn't have any calls with clients, I didn't work on any models, I didn't work on my movie listings, absolutely nothing. all I did was sit on my butt and play video games. Here's my life lesson of the day folks: Every once in a while, you just have to do nothing. Just like every 3 or 4 months just take a day off from everything. Arrange time off from work, get it on a day you don't have class, in a period where you're not prepping for something, and just do nothing.
But that doesn't mean I haven't been working on stuff the last couple weeks. I'm taking a little break from the Thunderbolt due to finances. I'm not broke but I need to reconsider my spending a little bit. When I went full time at work I immediately applied for benefits. So now I have a 401k, Tuition reimbursement, Health Insurance, Dental Insurance, Vision coverage, a Stock portfolio, and a bunch of other nice little tidbits that come with working 35+ hours a week. So yeah me! Buuuut.... I have to pay for some of those benefits. It's not like crippling huge, but you notice that $90 being take out of your check. Plus I'd like to take a trip out to Arizona and actually meet some folks face to face that I've been talking with online for what seems like ages and eons now.
So have I been sitting idle? Yeah right. I said I took one day off and did nothing. But I'm the living embodiment of ADHD, I can't sit still and not work on something. So what have I been working on? Well a couple things actually.
First thing, a Nurgle demon prince/Greater daemon. It's the Forge World Mamom model I got from a lot auction on Ebay. I bid $100 on the lot of "40k stuff" and got a Hell Blade fighter, a hand full of Chaos Renegade torsos, the Mamon daemon prince, several auto-cannons, a hand full of lascannons, some Space marine torsos and legs, the top section of a Rhino, and a bunch of other stuff. The Hell Blade was complete and I built it... and I gotta say I dislike the model even more now. I'll go into more detail about it later.
But I also built the Mamon figure. With the exception of one tube the model was complete but it was partially deformed in some spots and left gaps that I just wasn't comfortable with leaving unattended to. So I went at it with the sculpting putties. I used 2 types of putty on the model based on where I was using it. Around the elbow of the club fist, and the neck line I used milliput because those were largely flat areas where if the putty failed to hold it would simply appear to be skin flapping off the muscles. Around the shoulder, and where the tube connects to the arm I used Kneadite (Green stuff) to fill in the gaps. I also rolled out a tube of kneadite to replace the missing tube on the back of the arm. I'm going to go back with some more kneadite and add decay and rot to the tube.
Beyond the Daemon prince I'm still working on some scratch building in the form of a drop pod. As I explained previously, the template I have I think makes a drop pod that is just too small to serve as a transport drop pod, but I do think it's the right size for a death storm drop pod. So that's what I'm gonna try and build this pod as:
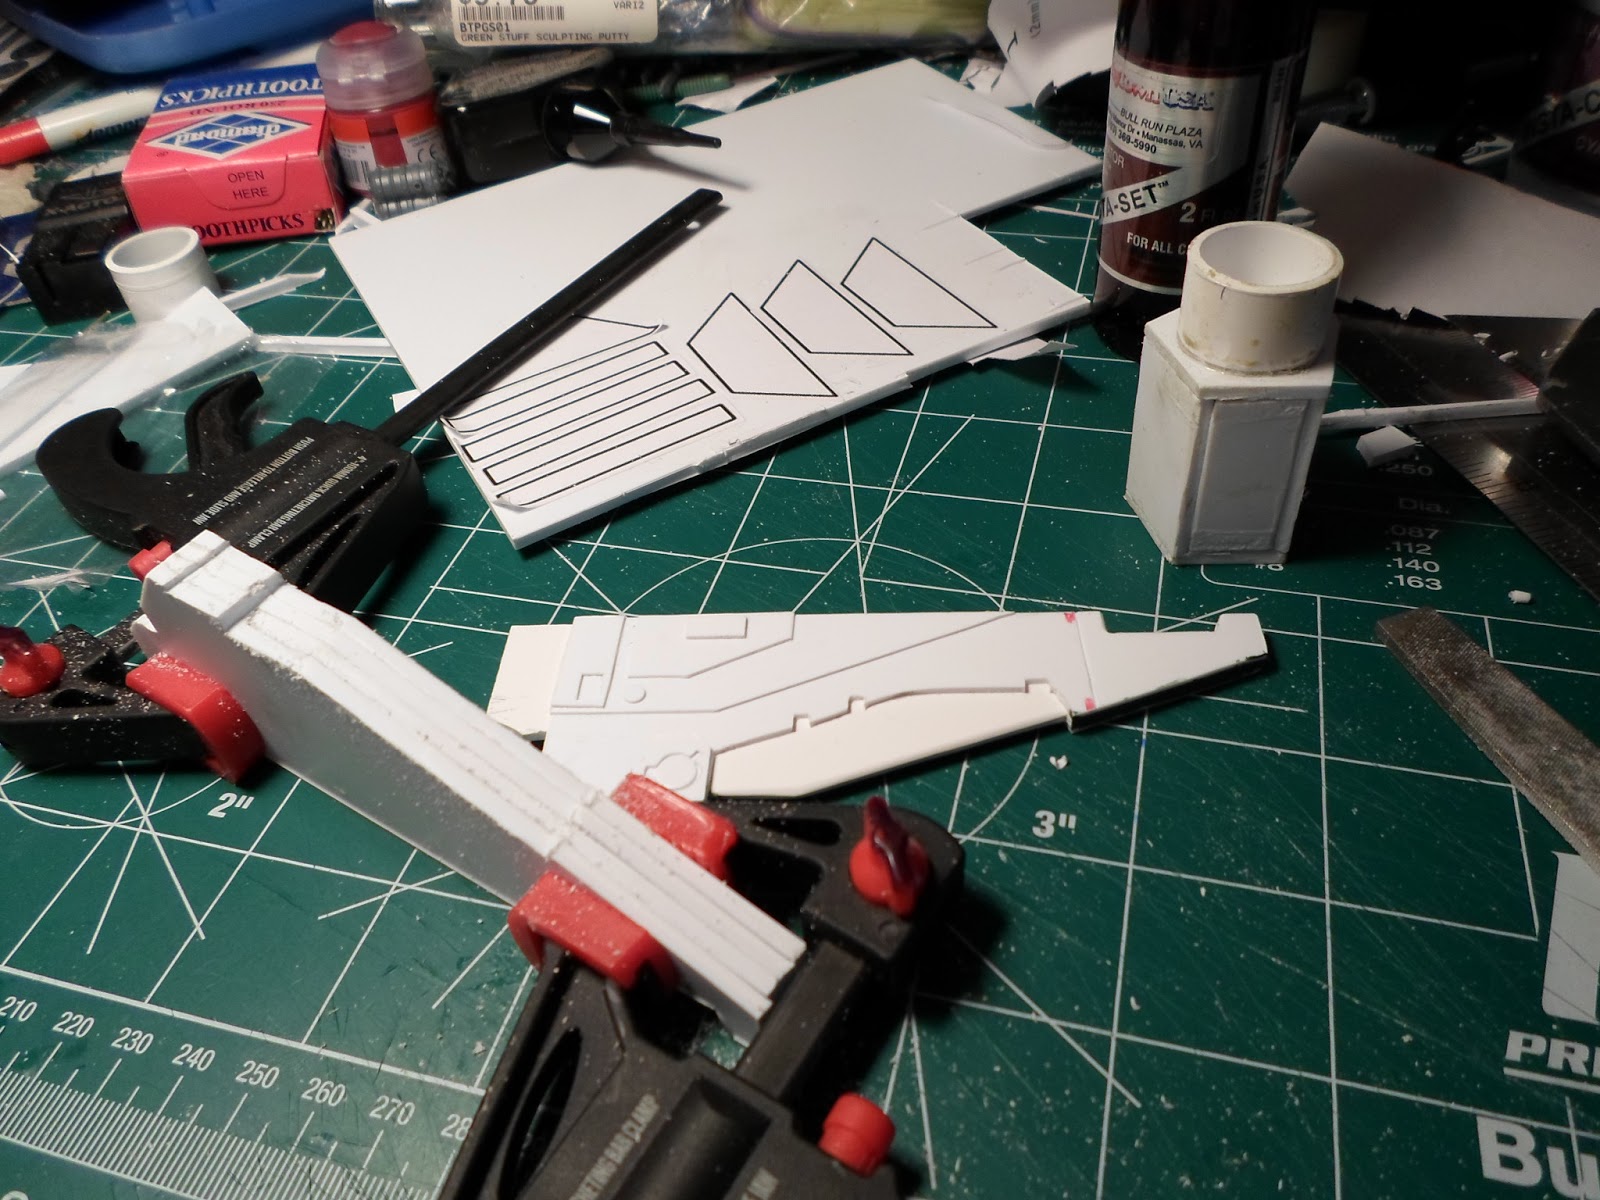
Here you can see the first wing master I produced in sheet styrene. I'm working on the other four now:
Here you can see the four segments of 2mm thick styrene attached with super glue and held in place with a clamps. This allowed me to take a file to the edges of the parts to make them all match. It's a slow process, cutting through 2mm of styrene is a slow process. And then sanding all the parts down... yeah a bit monotonous.
So with the whether kind of sort of maybe in a weird reverse sort of way starting to head in the springy direction, I've started getting ready for the days when the temperature will be warm enough and the humidity low enough to make priming my models doable. Toward that end I've partially assembled 3 attack bikes, 3 land speeders, and a drop pod and mounted the parts on tooth picks mounted in sections of wood I'm going to use as painting sticks.
And you see the... that's a lot of parts and pieces. There are three 2' sections of wood filled with holes that are mounting the parts of the landspeeders, attack bikes and drop pod. I've also got a unit of Assault marines that I'm in the process of preparing to be painted that will like wise be added to the priming party. And a 5 man unit of Terminators. And to think, I drilled all 76 of those holes with my pin vice.
So, I've had a rather bizarre series of luck the last couple weeks where I won a bunch of Ebay Bucks and used them to buy a couple kits and then I won a raffle that netted me another kit and then I got a discount at the hobby store that netted me basically a free land speeder, honestly I've lost track of it. But I took all the kits I have sitting in my cabinet waiting to be worked on and stacked them up and was rather shocked at my haul of waiting to be built kits:
Let me count out what this is getting my Blood Ravens forces:
3 Land Speeders
1 Attack Bike
6 Biker Marines
1 Land Speeder Storm
2 Drop Pods
5 Assault marines.
With the whether beginning to change toward the warmer temperatures I'll be somewhat short on time to get all of these kits built and ready for priming before the "Too-Hot" to prime weather hits. I still have those three attack bikes I built a few weeks ago ready for priming too.
So I'm still more or less running on neutral for the Thunderbolt project, which also means the Thunderhawk project is on hold for the moment. In truth alot of my hobby stuff is kind of on hold or at least on slow-mo for the immediate time being. Money has become a bit more of a consern then I had anticipated so I need to curtail my hobby purchases for the immediate time. But, that doesn't mean I'm not doing stuff. It just means I'm doing different stuff. Here is one such example:
Yep a paper hammer drop pod! There isn't a particular reason I built this model, well not one beyond the fact that I had the template and didn't have anything better to do with my time that I was interested in. So a couple microwavable pizza boxes, about an hour in photoshop to color the template, 20 minutes to print out the 3 pages and like 3 hours to build it.
Over all I like the final product, there's just one little problem:
It is too small to carry a full 10 man squad of marines. You can see here how it would only 4 marines. Not a particularly huge deal I suppose, but it is a point of annoyance for me. I think I'll build 3 more and modify them to be Deathwinds though.
I purposely glued the door panels open mainly to be fair to my opponents but also because I just really can't stand seeing a closed drop pod sitting on the table. It's kind of like with the Storm Raven model if you add the hurricane bolters. How the *bleep* do the marines get out of the thing? I know I know, it's representational not functional. But you know? It's my model! If those points bug me, that's my problem! :P
You ever have a moment when you're working on a project, you look up
for a second and something catches your eye? So you stop what you're
doing and concentrate to figure out what that something is? And then you
figure it out and you are like "Where the frack did that come from?"
That
happened to be earlier today. When I noticed that I had a 40k version
of Duke Nukem sitting on my work bench looking back at me:
So I've been working on a new attack bike squad for my Blood Ravens. From what I've been looking at rules wise, I think Biker armies are gonna be the default go-to army for 6th edition. Hammer of Wraith, T5 all the time, a 12" move with an extra D6 charge range, relentless. I mean let's face it bikers got a lot going for 'em now.
So here is my new and freshly converted attack bike squad:
So I'm sure you're sitting there saying "Wait a second, you said they were converted. And that they were attack bikes. Yeah the one dude's got the scanner array backpack, but what's actually converted? And why aren't they attack bikes?"
Well, I guess I used the wrong word. I think I would have been better off saying they are transformable as opposed to converted. Allow me to show you what I mean. Here is the same bike squad with different bitz:
You can see the two forward most bikers are now armed with a melta gun and plasma gun. Here is another change:
I magnatized them so I can swap the configurations between Biker and attack bike. With the addition of magnets in the right shoulder, the models are able to swap arms so they can be armed with different weapons. By putting magnets in select locations in the under carraige of the bike and matching points on the side car I can attach and detach the side car as needed.
A good while back I was playing Dawn of War II and I had become inspired to begin work on a Blood Ravens army. Well they had sat on the back burner for far too long and with my funds effectively stopped, following my recent medical bills, they came out of the case and got some paint on some of them. Here are two of the bikers that I got painted the other day.
First up we have the Captain on a bike:
Blood Ravens Captain on a bike with a relic blade
Model wise he's a fairly straight forward conversion. Grey Knight helmet and great sword in right hand. The sword hand was attached to a converted rifle holding arm that I cut below the shoulder and repositioned it to be held outward. A couple other little bits add to the seniority of the model like the Raven Guard faring on the front of the model. The base is one point I would like to reference though. It comes from Dragon Forge Studios and I highly HIGHLY recommend their bases. I swear by them.
Next we have the sergent for the squad:
Blood Ravens biker Sergent with Power sword
I installed a magnet in the sergeants' left shoulder to allow him to use different weapons. This is going to be compatible with my other magnetized models in the army, allowing them to swap weapons as I see fit.